
Water Monstera Propagation + Care

If keeping up with watering plants just isn’t your thing, you’ve found the right article!
Monsteras are versatile and hardy plants, making them great for beginner plant parents.
If you want to make some cuttings to share with a friend, one of the easiest options for starting them out is in a jar of water.
In this post, we’ll look at:
How to Take a Healthy Cutting
Propagating Monsteras Using the Water Method
How to Grow Your Monstera in Water Full Time
How to Take a Healthy Cutting
Want to start a new Monstera plant? Let’s get it off to a good start!
First, you’ll want to gather:
A sharp blade or pruning knife
Rubbing Alcohol
A Container to hold the cuttings for an hour or two
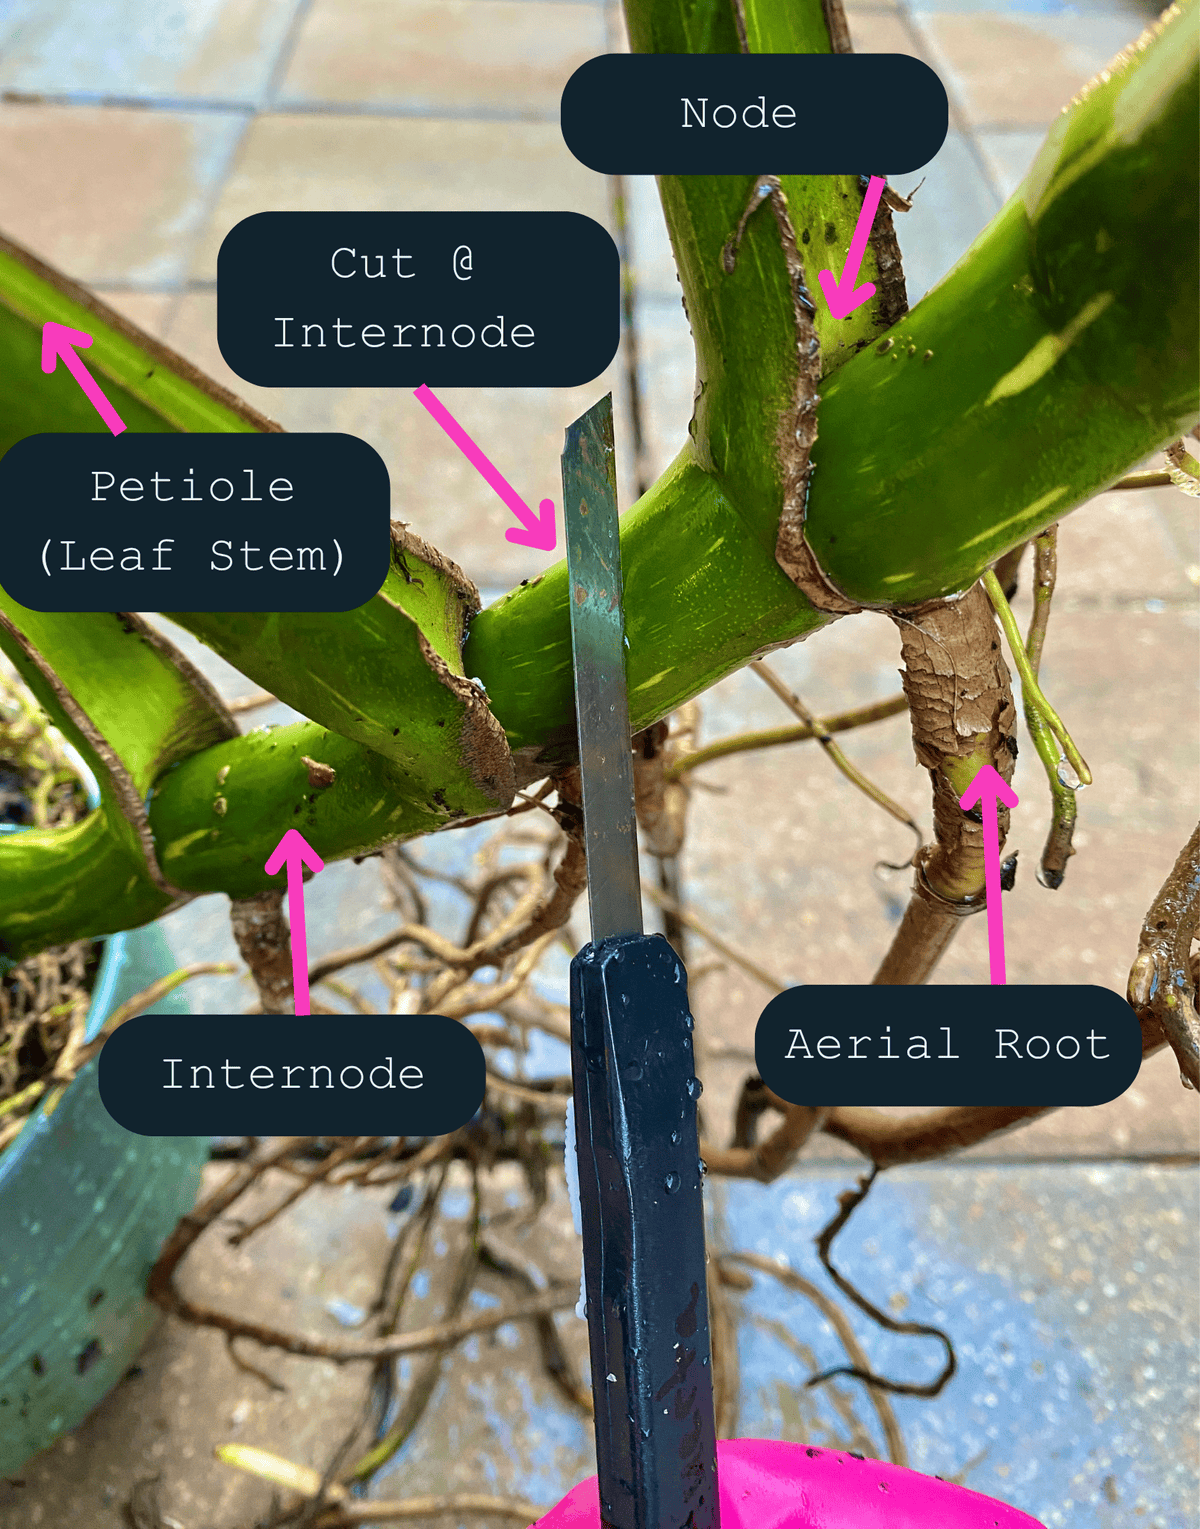
Identify the nodes.
Top cuttings are often the most sought after when purchasing variegated plants. They include the top node of the plant, as well as at least one leaf and the crown.
Mid cuttings are any node and leaf pairs that are taken along the stem after the top cutting, and before the main root ball.
Bottom cuttings are typically the fastest cutting to get new leaf production, because they have the benefit of an established root system.
Once you decide what type of cutting you want to make, confirm that the section has at least one arial root (you’ll want to include it).
Monstera are in the Philodendron family, making them a toxic plant, so be sure to wear disposable gloves when cutting and handling cut portions of the plant. Avoid contact with skin, and wash thoroughly with cool water after you are finished.
Disinfect your blade and make a smooth cut straight through the internode you’ve chosen. Using a new blade on a utility knife helps to avoid making multiple lacerations in the same cut. Cuts in the stem cause weak points for bacteria to enter.
Place your cutting in a clean container and allow the exposed end to dry at least an hour, or until it callouses over. This will be an extra protection against stem rot when it’s added to the water.
Propagating Monsteras Using the Water Method
Place your new cutting in a vase or glass jar that has been washed thoroughly. Choosing a container that you can easily clean every few weeks is important.
I like to use glass so I can monitor the progress of the roots, and quickly notice any decay.
Fill the water up to just below the node, so that any aerial roots are submerged but the stem is out of the water. (It’s ok if the top part of the roots peek out a bit)
In the beginning especially, I like adding a couple tablespoons of Hydrogen Peroxide 3% when I change the water. It helps kill that weird slimy bacteria that builds up on the roots, and is completely safe (after a few minutes it turns into water H2O2 ->Evaporation-> H2O).
From time to time, if you see a lot of build up on the roots, it may be a good idea to take the roots out and rinse them under running water, you can put on gloves and gently wipe them off as well.
During the first two weeks it’s best to change the water daily. As you begin to see lots of water roots you can slow down to about once a week.
Place that plant in front of bright, indirect light. Mist/wipe down the leaves every couple weeks to remove dust.
Don’t forget to fertilize! See below under “Fertilizer” for further care.
It’s not ideal for your cutting to switch back and forth from water to soil, so if you decide to make the transition, be sure to water it thoroughly and frequently.
See the section below for a better understanding of the process.
How to Grow Your Monstera in Water Full Time

Have trouble keeping up with plants that love water?
Some of them are happy to stay in a vase full time!
There are a few steps you should know before pulling your plant out of the ground…
There’s an adapting period when you go from soil to water and vice versa. Your plant will gradually replace it’s “soil roots” with “water roots.”
This happens because soil roots draw oxygen from air pockets in the soil. (The reason having a lighter, less dense mixture with drainage is important when keeping these plants in substrate)

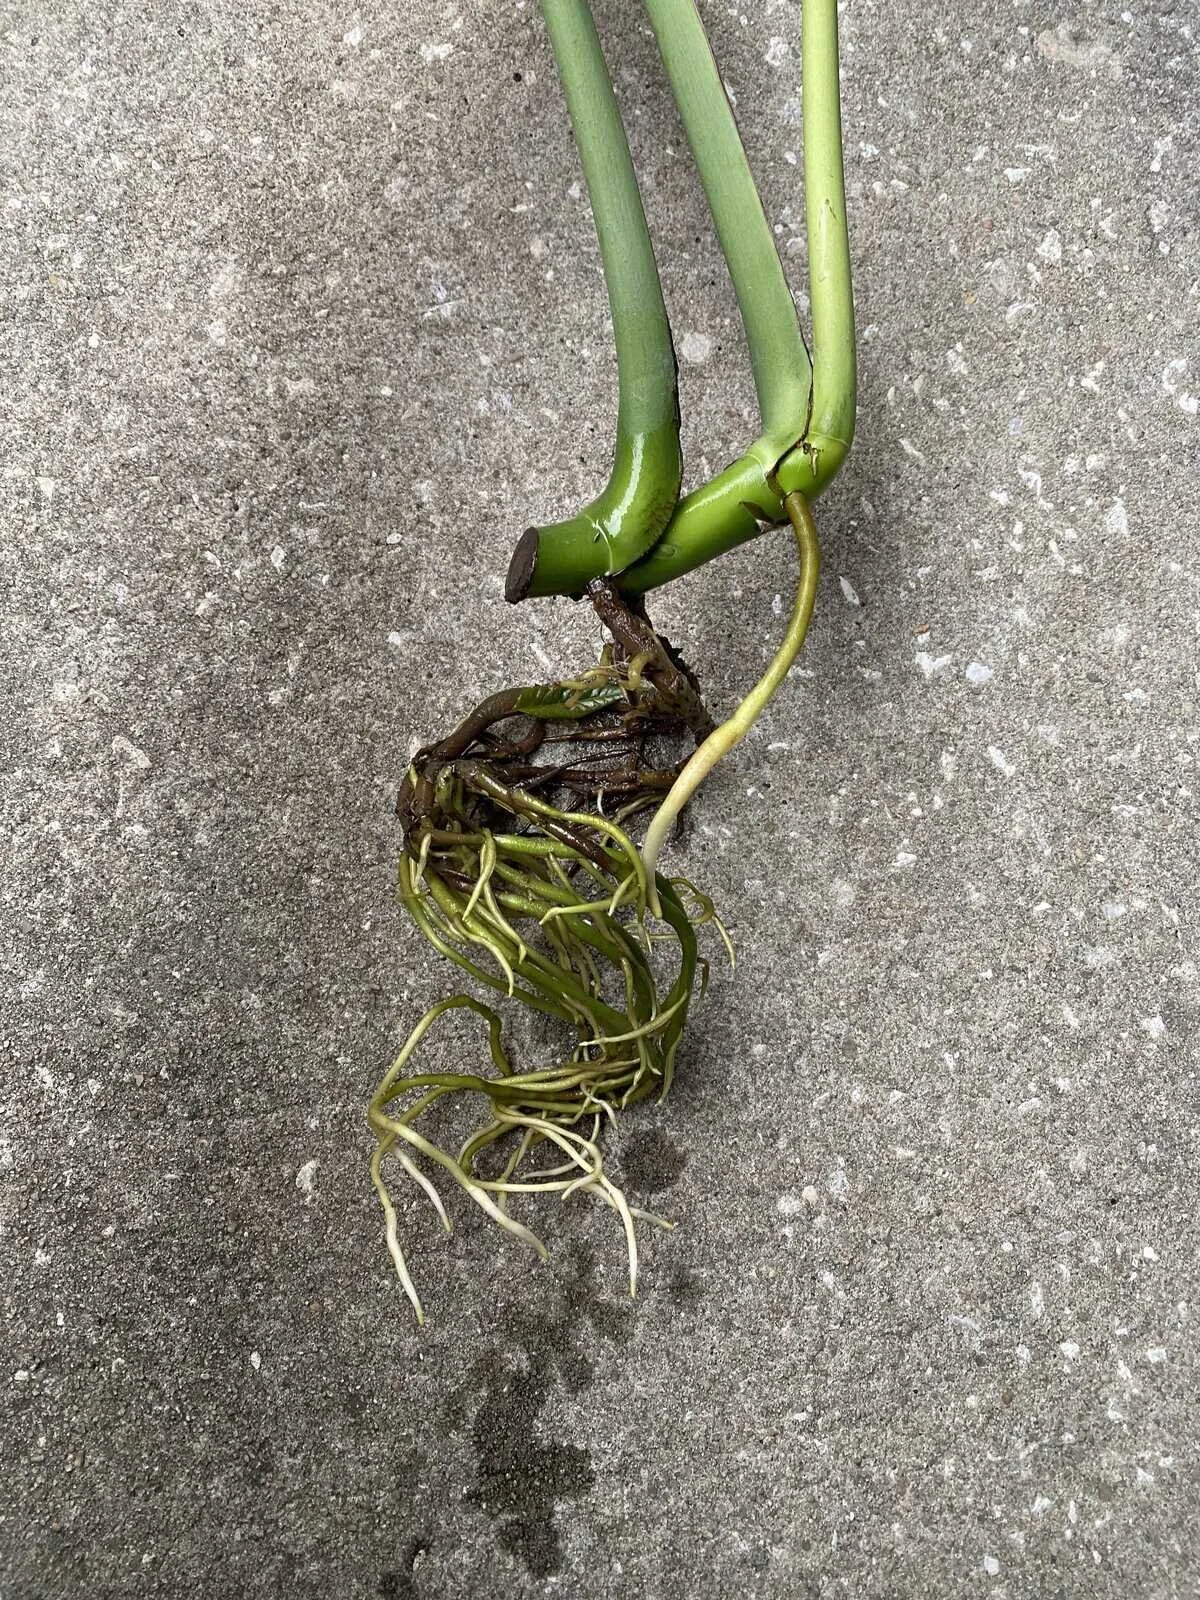
Here you can see green water roots beginning to develop.
Older, brown roots will gradually deteriorate & will have to be removed to keep the plant healthy.
Key Details about this Transition:
Oxygen Deprivation
Soil roots rely on air pockets in soil to access oxygen, which is not as available in water, causing them to break down.
Changing the water daily will help the transition as fresh water offers more oxygen than sitting water.
2. New Water Roots
As the plant adjusts to its water habitat, it will start producing new roots specifically designed to function in water.
Be sure to clip off soft, squishy roots that the plant is no longer putting energy into. Save firm, slightly green roots.
3. Transitioning to soil
When transferring a water-propagated plant back to soil, the old water roots often die back, and the plant will have to take time to develop new roots dependent on a soil environment.
Be patient with this process, and keep a close eye on your plant during the transition. Apply a smally amount of Hydrogen Peroxide 3% to reduce root rot.
If you’re transitioning an entire plant to water:
Remove all soil from roots, wash thoroughly, and if the root ball is large, remove most of the older roots. Your plant will need to focus most of its energy on growing water roots, so be patient and know that it will slow down leaf growth for a time. Change the water daily and remove soft, mushy roots each time you see them. Use snips to cut off sections that show signs of rot.
Be prepared for root/leaf loss. Keep care consistent and provide lots of bright, indirect light. Don’t forget to fertilize!
Fertilizer
I use a liquid tropical plant fertilizer 1-0.5-1, diluted by half the recommended “serving” roughly every 7-10 days.
This is the one I use for all my water plants: Miracle-Gro Tropical Houseplant Food - Liquid Fertilizer for Tropical Houseplants, 8 fl. oz.
As an Amazon Associate, I earn from qualifying purchases. I only share plant care products that I have personally used.
This is very important for plants kept in water, because they can only live so long without being given nutrients! If you’ve ever tried to propagate a plant in a little cup of water, and it grew roots but the leaves slowly began to wrinkle and fade, it’s probably because it needed some fertilizer! (I’ve totally made this mistake) The plant can only live off its stored energy for a short period of time before it needs nutrients to sustain itself.
If you want to experiment with hydroponics (growing plants in water with nutrient solutions) or aquaponics (growing plants in water with fish), monsteras are a great option to start out with.
